使用 DeltaTorch 解锁 Delta Lake 进行 PyTorch 训练
PyTorch 已成为许多应用中深度学习框架的首选。但是,管理 PyTorch 的数据加载管道可能具有挑战性,尤其是在数据集可能随时间演变的生产环境中。维护和访问早期版本的训练数据可能困难且成本高昂;并发读写可能会中断训练作业;大型数据集可能会导致显著的性能开销。
DeltaTorch 使 PyTorch DataLoaders 能够无缝地使用 Delta 表作为数据源。这些 DataLoaders 在 PyTorch 训练管道期间处理数据的批处理、采样和多处理,而无需 Delta 表的临时副本。
Delta Lake 是一种开放格式存储层,它使用快速的 Parquet 文件格式以及事务日志,可以缓解这些问题并提高训练数据的可靠性和性能。Delta Lake 在 S3 或 ADLS 等 blob 存储之上提供 ACID 事务、可扩展的元数据处理以及统一的流/批处理数据处理。这可以为 PyTorch 用户带来许多优势:
- 快照隔离确保并发写入不会影响读取数据的训练作业。
- 完整的历史记录和回滚允许访问数据集的先前版本,用于模型再训练或比较。
- 数据跳过、缓存和谓词下推等性能优化可加速训练。
- 统一的批处理和流式摄取简化了数据管道。
DeltaTorch 库通过提供从 Delta 表创建 PyTorch DataLoaders 的方法,为 PyTorch 解锁了 Delta Lake 的优势。本文展示了如何从以 Delta Lake 格式保存的 MNIST 数据集创建 PyTorch DataLoader,以及如何使用 DataLoader 训练一个简单的 CNN 模型(深度学习的“hello, world”)。
设置
安装 DeltaTorch
您可以使用 pip 通过 pip install git+https://github.com/delta-incubator/deltatorch 安装 DeltaTorch。它需要 Python 版本 > 3.8。
启动 Spark 会话
以下代码片段配置了一个支持 Delta Lake 的 PySpark 会话。我们将使用它来保存/加载示例 Delta 表。请注意,某些运行时环境(例如 Databricks)会为您配置 Spark 会话,因此您无需自行操作。
import pyspark
from delta import *

builder = (
    pyspark.sql.SparkSession.builder.appName("deltatorch-example")
    .config("spark.sql.extensions", "io.delta.sql.DeltaSparkSessionExtension")
    .config("spark.sql.catalog.spark_catalog", "org.apache.spark.sql.delta.catalog.DeltaCatalog")
)

spark = configure_spark_with_delta_pip(builder).getOrCreate()
获取数据并将其保存为 Delta 表
我们使用 torchvision.datasets.MNIST 下载 mnist 数据集并将其保存为 Delta 表。
在处理数据时有几点需要注意:
- 我们向数据添加了一个唯一的 ID 字段。这是必需的,因为 DeltaTorch 使用 ID 字段进行分片和并行数据加载。
- 我们将图像从 PIL 图像转换为 numpy 数组,然后将它们保存为字节数组。我们定义的 DataLoader 将包含将它们转换为张量的逻辑。
from torchvision import datasets
from pyspark.sql.types import IntegerType, StructType, StructField, FloatType, BinaryType
import numpy as np

train_set = datasets.MNIST(root="./data", train=True, download=True)
test_set = datasets.MNIST(root="./data", train=False, download=True)

schema = StructType([
    StructField("id", IntegerType(), False),
    StructField("label", FloatType(), False),
    StructField("features", BinaryType(), False),
])

schema = StructType([
    StructField("id", IntegerType(), False),
    StructField("label", FloatType(), False),
    StructField("features", BinaryType(), False),  # Changed ArrayType(IntegerType()) to BinaryType()
])

# Convert images to numpy arrays and save as binary
train_data = [
    (i, float(y), bytearray(np.array(x))) for i, (x, y) in enumerate(train_set)
]

train_df = spark.createDataFrame(train_data, schema).repartition(50)

test_data = [
    (i, float(y), bytearray(np.array(x))) for i, (x, y) in enumerate(test_set)
]

test_df = spark.createDataFrame(test_data, schema).repartition(50)

# Write the DataFrame to Delta Lake format
train_df.write.format("delta").mode("overwrite").save(
    "./data/mnist_delta/train"
)

test_df.write.format("delta").mode("overwrite").save("./data/mnist_delta/test")
既然我们已经将图像数据保存为 Delta 表,那么让我们确保我们可以检索图像。
# Preview one of the images
import matplotlib.pyplot as plt
import numpy as np

# Read from the delta table
train_df_from_delta = spark.read.format("delta").load(
    "./data/mnist_delta/train"
)

# Preview one of the images
import matplotlib.pyplot as plt
import numpy as np

# Select one row from the DataFrame
row = train_df_from_delta.filter(train_df_from_delta.id == 7).first()

# Extract the image data and label
image_data = row["features"]
label = row["label"]

# Convert the binary data back to a NumPy array and reshape it
image_array = np.frombuffer(image_data, dtype=np.uint8).reshape(28, 28)

# Plot the image
plt.imshow(image_array, cmap="gray")
plt.title(f"Label: {label}")
plt.show()
它返回
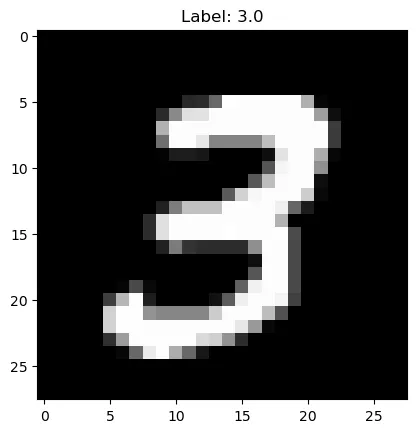
我们可以毫无问题地从 Delta 表中检索图像数组。现在我们准备好使用这些 Delta 表作为数据源来定义 PyTorch DataLoaders。
使用 DeltaTorch 定义 DataLoaders
DeltaTorch 库公开了一个关键方法:deltatorch.create_data_loader。此方法允许您指定 Delta 表的路径、ID 字段、要加载的数据字段以及各种其他配置选项。
如前所述,我们需要包含一些逻辑,用于将图像的字节数组表示转换为张量。我们通过创建以下可调用 Python 类来实现此目的。我们将其创建在一个单独的 utils.py 文件中,以便在使用 Jupyter notebook 时一切正常。在使用 Jupyter notebook 进行多处理时,局部定义的类不可序列化。通过将 BinaryToFloatTensor 类移动到单独的文件 (utils.py),我们确保它可以被 pickle,从而可以在多处理上下文中使用。
# utils.py
import numpy as np
import torch

class BinaryToFloatTensor(object):

    def __call__(self, pic):
        """
        Convert a byte buffer representation of an image to a float tensor.

        Args:
            pic (bytes): A byte buffer representing an image.

        Returns:
            torch.Tensor: A float tensor representing the image.
        """
        np_array = np.frombuffer(pic, dtype=np.uint8).reshape(28, 28).copy()
        return torch.from_numpy(np_array).float()
现在我们可以导入这个类并定义 PyTorch DataLoader。
from deltatorch import create_pytorch_dataloader, FieldSpec
from utils import BinaryToFloatTensor

def create_data_loader(path: str, batch_size: int):
    return create_pytorch_dataloader(
        path,
        id_field="id",
        fields=[
            FieldSpec("features", transform=BinaryToFloatTensor()),
            FieldSpec("label"),
        ],
        num_workers=4,
        shuffle=True,
        batch_size=batch_size,
    )
此函数接受 Delta 表的路径和批大小,并返回一个 PyTorch DataLoader。我们可以使用以下代码片段从我们保存为 Delta 表的训练数据中创建 DataLoader:
train_dl = create_data_loader("./data/mnist_delta/train",
                             batch_size=32)
这为我们提供了一个即用型 PyTorch DataLoader
> type(train_dl)

torch.utils.data.dataloader.DataLoader
示例训练循环
现在让我们让 DataLoader 开始工作!我们将在 MNIST 数据上训练一个简单的 CNN。
import torch
import torch.nn as nn
import torch.optim as optim
from tqdm import tqdm

# Define the network architecture
class SimpleCNN(nn.Module):
    def __init__(self):
        super(SimpleCNN, self).__init__()
        self.conv1 = nn.Conv2d(1, 32, kernel_size=3, stride=1, padding=1)
        self.relu = nn.ReLU()
        self.maxpool = nn.MaxPool2d(kernel_size=2, stride=2)
        self.fc = nn.Linear(32 * 14 * 14, 10)

    def forward(self, x):
        x = self.conv1(x)
        x = self.relu(x)
        x = self.maxpool(x)
        x = x.view(-1, 32 * 14 * 14) # Flatten the tensor
        x = self.fc(x)
        return x

# Create the network, loss function and optimizer
device = torch.device("cuda" if torch.cuda.is_available() else "cpu")
model = SimpleCNN().to(device)
criterion = nn.CrossEntropyLoss()
optimizer = optim.Adam(model.parameters(), lr=0.001)

# Train the network
for epoch in range(3): # Loop over the dataset multiple times
    correct = 0
    total = 0
    progress = tqdm(enumerate(train_dl), total=len(train_dl))
    for i, data in progress:
        # Get the inputs; data is a list of [inputs, labels]
        inputs, labels = data["features"], data["label"]
        inputs = inputs.unsqueeze(1).to(device) # Add an extra dimension for the single channel (grayscale)
        labels = labels.to(device)
        # Zero the parameter gradients
        optimizer.zero_grad()
        # Forward + backward + optimize
        outputs = model(inputs)
        loss = criterion(outputs, labels.long()) # Use long() to ensure the labels are of the correct type
        loss.backward()
        optimizer.step()
        # Accuracy
        _, predicted = torch.max(outputs.data, 1)
        total += labels.size(0)
        correct += (predicted == labels.long()).sum().item()
        if (i + 1) % 100 == 0: # Print training accuracy every 100 batches
            acc = 100 * correct / total
            progress.set_description(f"Loss: {loss.item():.4f}, Accuracy: {acc:.2f}%")
    print(f"Epoch {epoch + 1}, Loss (Train): {loss.item():.4f}, Accuracy (Train): {acc:.2f}%")
它返回
Loss: 0.0001, Accuracy: 94.12%: : 1876it [00:33, 55.81it/s]
Epoch 1, Loss (Train): 0.0693, Accuracy (Train): 94.12%

Loss: 0.0136, Accuracy: 97.40%: : 1876it [00:33, 56.84it/s]
Epoch 2, Loss (Train): 0.0031, Accuracy (Train): 97.40%

Loss: 0.0009, Accuracy: 97.89%: : 1876it [00:33, 55.79it/s]
Epoch 3, Loss (Train): 0.0004, Accuracy (Train): 97.89%
现在我们可以从我们的测试数据 Delta 表中创建一个 DataLoader,并检查测试准确性。
test_dl = create_data_loader("./data/mnist_delta/test",
                            batch_size=32)

# Function to calculate accuracy

def calculate_accuracy(y_pred, y_test):
    _, predicted = torch.max(y_pred, 1)
    total = y_test.size(0)
    correct = (predicted == y_test).sum().item()
    return correct / total

model.eval() # Set the model to evaluation mode
total_accuracy = 0
with torch.no_grad(): # We don't need gradients for evaluation
    progress = tqdm(enumerate(test_dl), total=len(test_dl))
    for i, data in progress:
        inputs, labels = data["features"], data["label"]
        inputs = inputs.unsqueeze(1).to(device) # Add an extra dimension for the single channel (grayscale)
        labels = labels.to(device)
        # Forward pass
        outputs = model(inputs)
        # Calculate accuracy
        acc = calculate_accuracy(outputs, labels.long()) # Use long() to ensure the labels are of the correct type
        total_accuracy += acc
        # progress.set_description(f"Accuracy: {acc*100:.2f}%")
    # Calculate average accuracy over the entire test set
    average_accuracy = total_accuracy / len(test_dl)
    print(f"Average test accuracy: {average_accuracy*100:.2f}%")
它返回
Average test accuracy: 97.32%结论
本文展示了如何使用 DeltaTorch 库创建一个带有 Delta 表源的 PyTorch DataLoader。Delta Lake 的可靠性特性,例如 ACID 事务和版本控制,以及 Z-ordering 和数据跳过等性能优化,比用于训练深度学习模型的其他数据格式有了显著的改进。无论您是 Delta Lake 的长期用户,还是有兴趣在下一个深度学习项目中首次探索 Delta Lake 的优势,您都可以按照本文中的示例开始使用 DeltaTorch。
有关更多资源,请查看项目的GitHub 存储库。特别是,请查看示例目录,了解如何在不同类型的 PyTorch 项目中使用 DeltaTorch 的示例。此外,请查看 Michael Shtelma 在 2023 年数据和人工智能峰会上的演讲:在 Databricks 上使用 Delta Lake 存储格式扩展深度学习。
您可以在此处找到本文中的所有代码。